12/20/19 Update: You might want to look at our more updated article on wintering bees in Michigan.
It’s that time of the year again here in Michigan! In recent days we’re starting to spot a few snow flakes floating in. The past couple of weekends we were busy preparing our apiaries for another long Michigan winter. Actually the preparation begins way back in late July August, believe it or not. We’ve found the most essential criteria in wintering colonies is that they must go into the winter with low mite counts. Of course, they must also have plenty of healthy bees and food stores, but even if the hives are heavy, if they are carrying a significant mite load they will not winter well.
We’ve experimented a bit in the past trying to find a more foolproof way to winter bees here in our locality. Our batting average when it comes to wintering bees has ranged from total success (100% survival – a rare event!) to a almost total loss (10%). On average we seem to hit 70-80% success. In addition to making sure our colonies carry low mite loads, and have plenty of stores we also wrap our bees and insulate the tops. What follows is a step by step description of our final winter prep.
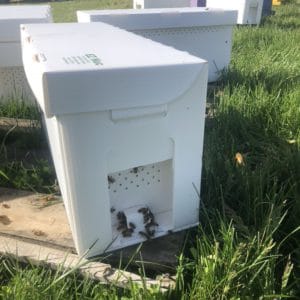
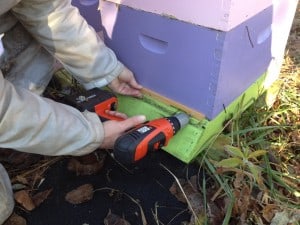
Step 1: Install entrance reducers. We like to do this earlier in October when the bees are not yet clustered and the probability that we’ve entrapped a mouse is really low. The entrance reducers are primarily to keep the rodents out of the hive. We like to use metal reducers, as they tend to be more effective. However, they take longer to install and we find that the wooden ones work as well, provided they are securely screwed in and not simply inserted with nothing to keep a persistant mouse from dislodging them.
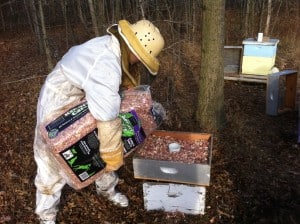
Step 2. Place an insulation chamber on top of the double deeps the colonies will wintering in. This is actually something we’ve just started doing last year after hearing an old-timer at the MBA meetings talk about it. We tried this on half of our colonies last year and discovered the following March that all the colonies that had insulated tops had larger clusters. This year we decided to do all of our colonies this way. We basically use older “retired” shallow or medium supers with hardware cloth cleated on the bottom to hold in the insulation. We’re using cedar shavings for insulation. To make sure the condensation can escape we create a chimney in the middle with a section of 3 inch PVC. We place the insulation chamber directly on top of the hive, place the inner cover on top of the insulation chamber and then place a twig on top of the inner cover to make sure there is a gap for air flow once we place the outer cover on.
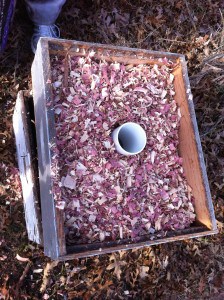
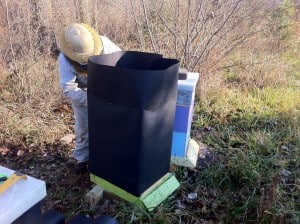
Shallow super with a screened bottom serves as an insulation chamber that sets on top of the hive.. The condensation chimney is made from a section of 3 inch PVC.
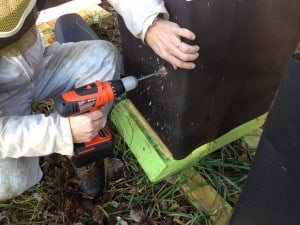
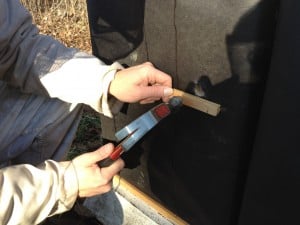
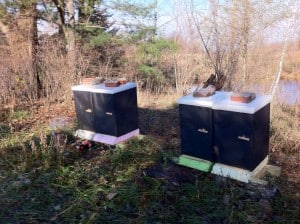
Step 3. Next we wrap each hive in roofing paper. We cut it down to size, wrap tight and secure the paper in place with a staple gun. The paper (at least in theory) should help warm the hive more on a sunny February afternoon and give the cluster a bit of mobility. Does it help? Seems to, though the few times in the past we’ve been too busy to get the hives wrapped we still had reasonable success. Another side benefit it is that it makes the hives a bit less visible from a distance. Once the leaves are down and the foliage all frozen away, a yard of bees even when way off the beaten path, seems to stick out like a sore thumb. Once wrapped they tend to be harder to spot, and hopefully less vulnerable to heartless human vandals and/or bee rustlers.
Step 4. Once the hives are wrapped we make sure each upper hive body has an upper entrance. This gives the bees and upper entrance if the reduced bottom entrance gets clogged with dead bees and other debris. It also provides a bit of extra ventilation to get rid of condensation.
Step 5: We tack a small wood cleat directly under the upper entrance. This makes it easier for bees to land and re-enter and also helps hold the paper up against the hive right where the bees will be going in and out.
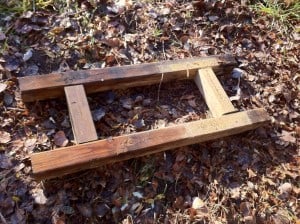
Step 6. The last thing we do is insert debris boards under the bottoms (we used screened bottom boards) and then shove hives together in pairs on their stands. We build our stands with wolmanized 4×4’s so that there is a dead air space under the hives when they are centered side by side. During the Spring/Summers we push them apart again.
That’s it! Not much left to do again until early March when we go and see how they did.




I have 2 hives to winter this year.
I have a large supper and a small supper with a gueen excluder between on both. they are full of stored honey.My question is -should I take the excluder out for the winter. I plan to split the strongest hive this spring if all goes well.I also plan to use 2 large supper from here on out.
Thanks for the info on wintering in Michigan, Im going to give it a try.
Greenhorn from coopersville,
616-510-5628
You definitely don’t want a queen excluder between those supers. As the cluster moves up during the winter, the queen will get left below and that will be the end of your hive. I would suggest wintering in two deeps here in Michigan. They need to be packed with honey – so heavy you can barely tip it forward from the back.
I spoke to you brother Nate today at his Mother and Father in laws 50th. I told him my interest on raising honey bees. He told me, ‘I know just the person you should talk to about this’. I’d like talk to you more in depth about raising bees, and maybe visit your hives? Thank-you, Steve DeJong
Steve – wow, talk about being tardy… i just noticed your comment now, three years after the fact! Feel free to email or give me a call.
I’m am making insulation chambers for my 2 hives and am finding the cedar chips keep flaking out of the smallest size hardware material I could find. Would adding screening above the hardware material be OK?
Jan, a little bit of cedar always seems to fall through, but the bees will drag it out of the hive on the first warm day, so I wouldn’t be too concerned about it. In any case, adding screening would probably not be a problem. Just make sure your chimney is open so the bees can retain a warm dry brood nest.
I haven’t had a hive in about 15 years so this past May I purchased a nuc and it has been doing great. I read above that you make your bee blanket with the cedar in a shallow box and use a 3″ pvc pipe to ventilate it. My question is the 3″ pvc pipe does not go through the cover does it? The cover goes on top and the blanket and pvc pipe are covered up correct?
Second question, you said you winter with 2 deeps, I have 2 mediums on top of my 2 deeps and they should be full of honey, ( I have to go in tomorrow to see ). Anyway do I remove the two mediums and leave them with only the 2 deeps or should I winter them with at least one of the mediums. I also plan to make a candy board (which I have never used before) does that go under the cedar blanket and then put the cover on?
Last question, when do I remove the roofing paper?
Thanks From Someone who need advice….
Larry
Hello Larry,
Correct, the PVC does not go through the cover. How much honey you leave on depends on where you live. Here in Michigan we winter in 2 deeps and make sure the top one is jammed full of honey, and the bottom one the top parts of the frames are usually honey. It needs to be so heavy that you can’t pick it up without a couple of people!
If you put a candy board on yes, you would put it under whatever you use for top insulation. Once the bees eat thru the honey you want the candy right on top where they will be when they run out of honey.
Johnathan
Follow Up from going into my second year beekeeping in Michigan. I followed the suggestions for wintering my hive over its first winter by using a candy board, a quilt (cedar shavings) and wrapping in tar paper. They came through in fantastic shape and this year I was able to pull off about 7 gallons of honey from a medium and shallow super while still leaving a lot below in the deep bodies. I was even able to split off the hive because of swarming concerns and both hives are doing great.
Thanks for all the advice as I am starting to get ready to prepare for this next winter.
I do have a quick question, I want to raise my bees naturally with out chemicals and I have read a lot about essential oils and other methods of treating for mites, I purchased Apiguard product on recommendation from an organic beekeeper but I would like to find out if anyone has had experience with it like when to put it in to the hive etc.
Thanks again
Congrats on your wintering success Larry. You absolutely must monitor and treat for mites when needed if you want to winter your bees. We’ve had some success with Apiguard, if you follow the instructions and temperatures are within the recommended range. Mite Away Quick Strips also will knock back mites, though a bit harder on queens then Apiguard. Oxalic Acid is an excellent cleanup treatment in late fall after the brood rearing has diminished. There are plenty of articles online about these treatments. Randy Oliver’s website is a good place to start.
Hi my name is Brogan and I’m 11 years old and I live in Michigan. I’m looking to get a flow hive. I need two questions answered ASAP. The first one is how do I get bees and the second is what can I do to have a more successful winter for bees. Thank you for reading this and hopefully replying to my questions.
Brogan, we wrote an article a while back on how to buy bees. You can read it here. On successful wintering, first of all avoid the flow hive. Its an expensive but well-marketed gimmick. Buy some conventional equipment from Don Lam over in Holland, MI. Second, monitor and treat for varroa mites consistently over the bee season. You can find some good articles on the Bee Informed Partnership website on how to do that. Third, leave plenty of honey on your colony going into the winter. We like our double deep configuration to weigh around 140-150 pounds (includes equipment, bees, and honey). Hope this helps.
I would like to try your shavings and chimney insulation technique. Question: is it essential to prop open the cover with the cedar chips and chimney? my top super has an escape opening and I was under the impression this aided the condensation issue by allowing for airflow. if yes to the question, how much of a gap should I leave on the lid, and would it be the entire lid or just one side? Also, I have a screened bottom, and due to serious ant issues, the hive is 12″ off the ground on a stand. would enclosing the stand around the bottom creating the “dead air space” be sufficient, or should I put something under the screened bottom? If so, what would you recommend that would not increase humidity in the hive? Thanx!!
It wouldn’t hurt to put a small wedge on one end of the inner cover to cause the outer cover to be propped up a quarter inch or so. As to the screened bottom board, we typically place whiteboards in the screened bottoms over the winter, but we’ve also forgotten to do this at times and the colonies still seem to winter just fine. Most important factors in wintering here in Michigan is #1: make sure you knock back your mite levels late summer (August) so that your bees going in to winter are disease free. #2: make sure your colonies have enough capped honey to survive the winter – feed them if you have to. If you don’t address both of these you are almost certain the colony will be lost no matter how well you insulate.
Hi, I have always taken an interest in beekeeping. I am a complete newbie and want to try and get started. I’ve been doing tons of research but I feel as if I have large gaps in my knowledge. Do you have any recommendations of book or websites for beekeeping in Michigan. This was a great article for winterizing, but I am having trouble getting started. Thanks!
@Cayley I’d suggest you join a local bee club. You can find a list of Michigan Bee Clubs on the Michigan Beekeepers Association website: http://www.michiganbees.org/michigan-bee-clubs/
For the bottom you stated using hardware cloth. Is that basically just a metal screen purchased at the hardware store? I’ve read others using canvas cloth. Would one be better than the other?
Yes, hardware cloth can be purchased at your local hardware. I’ve used canvas cloth as well. Either works fine, but hardware cloth will last longer.
I spoke to a commercial bee keeper and he did absolutely none of the wintering methods you talk about. He put the hive on the south side of a barn. He told me if snow covers the entrance the bees will make a tunnel so they can leave the hive. I put my hive in a sheltered area under my deck and gave the bees sugar water along with honey in the frames. I opened and found the bees to be alive and balled together. They were very lithargic and not moving around which I expected.
@Tom, yeah if you provide your bees with shovels they will tunnel through the snow! LOL. ALL of what is described here will be in vain if you miss the two points in the second paragraph. e.g., make sure your bees are healthy (knock back mite populations before they raise their winter bees in late summer / early autumn) and have enough nutrition. If you fail on either of these counts you will be buying bees in the spring. On the other hand, if you have plenty of healthy bees and plenty of nutrition your bees will have a reasonable chance at surviving without any insulation and/or wrapping. 🙂
First time bee keeper in Detroit here. I am getting mentally prepared for wintering bees, doing some research and I am wondering what I can do to ensure they have enough food to last the winter if they haven’t established enough honey in the super yet (it’s still early I know…)? My concern lies in the fact that we got a late start because our nuc as delayed. The hive has only been established since June 1st and I’m wondering if they should have stored more honey by now.
We supplement our colonies with sugar syrup late summer / early fall if they haven’t stored enough honey for winter. A colony established on June 1 in Michigan should have sufficient stores to winter by autumn. If not, there could be other issues including mites, or a poor performing queen.
I am on second my attempt at beekeeping this year here in mid-Michigan. Last year both of my hives were dead in late November. I was talking to someone who placed an additional shallow super full of honey below the two deeps as an additional barrier/insultation on the bottom. What are your thoughts?
@Jeremy, here in Michigan, the two deep configuration is sufficient for wintering, provided the top super is full of honey. In the future when you lose a colony, you need to figure out why your bees died. Meghan Milbrath has written an excellent article on this. Do you monitor for mites regularly during the bee season, and manage the mite levels in your hives? That is your biggest challenge to wintering bees. If you have sick bees it doesn’t matter how much honey they have!
First time bee keeping, I’m in the process of starting bees, I was looking for more local bee keepers to get my bees or capturing the bees. What would be the best method?
@Sadiq best approach would be for you to join a local bee club. You’ll likely meet somebody selling local nucs or splits in the spring.
Hi there!
First year beekeeper here in Grand Rapids! Wondering when/which month do you wrap and insulate your hives? Is it weather dependent?
@Krystle, we wrap them in black roofing paper in November. That’s mainly so they absorb the heat on sunny winter days and can break cluster / fly when conditions allow. We do insulate the tops, but that’s it. Way more important than wrapping is making sure you’re managing the mites, ensuring they have plenty of nutrition and are well-ventilated.
I thought I would try wool insulation (only because I have a bit left over from a project).
What problems would that make for my hive if I put it between the top cover and inner cover?
@Nancy I would not recommend wool! Wool tends to irritate bees given its animal origins. Use a piece of inexpensive foam board instead, as documented in this updated article I posted recently. https://hudsonvillehoney.com/2019/12/20/wintering-bees-in-michigan-revisited/
First year beekeeper my bees are doing really well both deeps are full and there working on there second supper right now. Can I take honey in august I’ve read some stuff that says not to take honey the first year. Is this normal progress in a year to draw out all that comb and fill it full
Whether you take honey off your colonies the first year, really depends on how much honey they’ve produced. We generally take all our honey supers off in August, leaving a standard 2 deep configuration. We always make sure the top deep is jammed full of capped honey, and a ring of honey in the bottom deep as well. All together, the double deep config when properly prepared for winter will weigh in excess of 130 lbs. Don’t be afraid to feed them LOTS of 2:1 (e.g. thick) syrup in early fall if they are lighter than that. It is much better to feed them syrup when the temps are still moderate than to mess around with winter patties, dry sugar feeding, etc. during the winter months The reason so many beekeepers are chattering about winter feeding techniques on the Internet, is because too many hobby beekeepers simply don’t properly prep their colonies when they can.
Do you take off the tar paper when or if the temp hits 70 in February like it did this year in west MI?